Want your blog post to grab attention, hold it, and convert readers? Then don’t just focus on the text—magnetic blog posts are crafted with the right image sizes, eye-catching graphics, and clean formatting. In fact, articles with visuals get 94% more views than those without, and using relevant images can increase information retention by up to 65%. If your blog feels “meh,” chances are it’s a design issue, not a content one. This post breaks down exactly how to format, style, and visually optimize your blog to keep readers scrolling—and sharing. Let’s dive into the visual science behind posts that perform.
You spend hours writing the perfect blog post, push publish, and then… Nothing. No shares, no comments, and no interaction. Does this sound familiar?
You’re not alone. Most bloggers focus primarily on words while completely ignoring the visual components that truly make people stop scrolling and start reading. Your blog article needs to be magnetic from the very first glimpse. This magnetism comes from smart formatting, optimal graphics, and design decisions that function well on all platforms.
Here’s the shocking truth → Blog posts with optimized images get 94% more views than those without.
But it’s not just about adding any image — it’s about using the appropriate dimensions, the perfect visuals, and creating a visual experience that pulls readers in and keeps them engaged.
Why Visual Elements Make or Break Your Blog Post
Let’s get serious about why images matter so much in today’s content world.
According to Google’s creator guidelines, engagement reflects all the ways your audience engages with your content — and visual aspects are the entryway to that engagement. When Christina Galbato, highlighted in Google’s blogger growth recommendations, adjusted her blog’s visual strategy, she saw her readership rise exponentially by focusing on consistent branding and eye-catching graphics.The evidence is clear → Human brains digest visual information 60,000 times faster than text.
This means your blog post graphic is the first thing visitors review — often within milliseconds — to judge whether your content is worth their attention.
Here’s what happens when you nail your graphic strategy →
- Increased dwell time → Readers remain longer on visually appealing posts
- Higher social shares → Well-designed visuals get shared 40x more often
- Better SEO performance → Google rewards pages with optimized imagery and user engagement
- Enhanced brand recognition → Consistent graphic components generate trust and authority
But here’s the kicker → Most bloggers get image optimization horribly wrong.
They either upload large files that degrade website speed, employ irregular measurements that violate their layout, or produce visuals that seem amateurish and unprofessional.Ready to alter that?
Let’s dive into the technological nuances that separate fascinating blog posts from forgettable ones.
What’s the best Size of blog images for WordPress
Time to explain the mystery about blog image dimensions once and for all.
According to WordPress’s thorough guide and WPBeginner‘s professional advice, the best blog post image size varies solely on your style and intended use. Here’s the breakdown that actually works →
Featured Image Dimensions
- For single-column layouts → 1200×675 pixels (16→9 aspect ratio)
This is your goldilocks zone. It’s broad enough to look crisp on PC, ideal for mobile viewing, and works nicely for social sharing. - For two-column layouts → 680×382 pixels
Smaller blogs or sidebar-heavy designs need more tiny graphics that don’t dominate the text content. - For square layouts → 600×600 pixels minimum
Perfect for themes that present featured pictures in grid style or when you’re planning to reuse content for Instagram.
Social Media Optimization
Here’s where most bloggers mess up → they generate one image and try to utilize it everywhere. Each platform has various requirements →
- Pinterest → 1000×1500 pixels (2→3 aspect ratio) – vertical images perform 2x better
- Facebook → 1200×630 pixels for best link previews
- Twitter → 1024×512 pixels for Twitter Cards
- LinkedIn → 1200×627 pixels for professional sharing
WordPress-Specific Requirements
WordPress automatically generates multiple picture sizes when you upload. Understanding them helps you optimize your workflow →
- Thumbnail → 150×150 pixels (square crop)
- Medium → 300×300 pixels maximum
- Large → 1024×1024 pixels maximum
- Full size → Your original upload dimensions
Pro tip → Always submit photographs larger than your largest display size. WordPress will automatically make smaller copies, but it can’t magically add pixels to little photos.
File Size Optimization
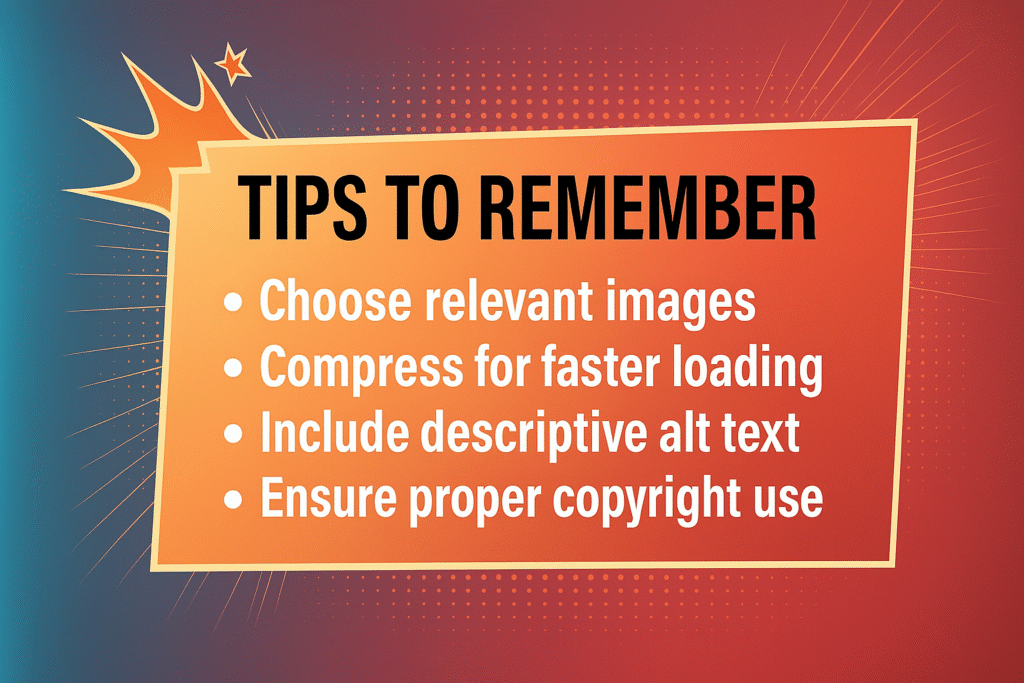
Here’s the technical sweet spot that most instructions miss → Your blog photos should be under 150KB while keeping visual quality. This balance is critical for page speed, which directly effects your SEO rankings.
Google’s guidelines are clear → page speed is a ranking factor, and photographs are often the largest items on your blog. Compress ruthlessly, but wisely.Want to know if your current photos are optimized?
Tools like Google PageSpeed Insights will tell you exactly which photos need work.
Mastering Best Blog Post Graphics That Convert
Now we’re getting to the exciting part → developing graphics that don’t simply look good, but actually drive action.
The psychology of magnetic graphics isn’t only about gorgeous colors and fonts. It’s about understanding how your audience consumes information and what encourages them to interact. Google’s audience engagement study suggests that successful content creators focus on developing genuine connections, and your graphics are a critical component of that relationship.
The MAGNETIC Framework
- M – Memorable → Use consistent colors, typefaces, and design that reinforce your brand
- A – Attention-grabbing → Employ contrast, hierarchy, and strategic white space
- G – Goal-oriented → Every graphic should have a defined purpose
- N – Niche-specific → Tailor images to your target audience’s preferences
- E – Emotionally compelling → Use colors and pictures that create the proper feelings
- T – Technically optimized → Perfect proportions, compressed files, detailed alt text
- I – Integrated → Seamlessly merge with your content, don’t merely embellish it
- C – Conversion-focused → Include subtle calls-to-action or brand aspects
Best Blog Post Graphic Design Principles
Typography hierarchy matters more than you think. Your blog post title should be the prominent text element, followed by your website URL or tagline. According to Canva expert Mariah Magazine’s tutorial, choosing templates based on layout rather than colors saves significant editing time and gives more professional results.
Color psychology in action →
- Blue → Trust, reliability (ideal for business blogs)
- Green → Growth, money, health (excellent for lifestyle content)
- Orange → Energy, inventiveness (excellent for DIY and tutorials)
- Purple → Luxury, inventiveness (great for premium content)
- Red → Urgency, passion (use sparingly for crucial announcements)
The 60-30-10 rule → 60% dominant color, 30% secondary color, 10% accent color. This generates visual harmony while keeping interest.
Template Selection Strategy
Stop choosing templates arbitrarily. Instead, match your template style to your content type →
- List posts → Use numbered components or bullet-point visualizations
- How-to guides → Incorporate step-by-step design elements
- Personal stories → Feature lifestyle photos and script typefaces
- Case studies → Use professional, data-focused designs
- Reviews → Include product images and star ratings
Brand consistency is non-negotiable. Google’s creator guidelines emphasize that your branding should quickly indicate what readers can expect. Your blog post images should be easily recognizable as yours, even without your branding.
WordPress Image Optimization Secrets
Here’s where we get into the technical nitty-gritty that actually influences your bottom line.
WordPress image optimization isn’t just about file size — it’s about creating a system that automatically tackles the heavy lifting while you focus on creating amazing content. Most bloggers are doing this entirely incorrectly and wondering why their pages load slowly.
The Technical Setup
Image formats matter more than most realize →
- JPEG → Best for pictures and complex images with numerous colors
- PNG → Perfect for graphics with transparent backgrounds or simple illustrations
- WebP → Next-generation format that’s 25-30% smaller than JPEG (activate if your theme supports it)
WordPress automatically creates different sizes, but you can alter these settings. In your WordPress admin, navigate to Settings → Media and adjust →
- Thumbnail size → 150×150 (maintain square for consistency)
- Medium size → 300×300 (ideal for inline pictures)
- Large size → 1024×1024 (excellent for featured pictures)
Advanced Optimization Techniques
Lazy loading is your friend. Modern WordPress themes contain this by default, but if yours doesn’t, plugins like WP Rocket or Smush can provide this feature. Images load only when they’re going to display on screen, substantially improving initial page load times.
CDN integration takes optimization to the next level. Services like Cloudflare or MaxCDN serve your images from servers geographically closer to your readers, decreasing load times by up to 60%.
Alt text optimization provides dual purposes → accessibility for screen readers and SEO benefits. Write descriptive alt text that includes your target keywords naturally → “WordPress best blog post graphics design tutorial showing Canva interface”
Plugin Recommendations
- For automated optimization → Smush or ShortPixel compress photos upon upload
- For advanced users → WP Rocket handles cache, lazy loading, and image optimization
- For photographers → Imagify provides superb compression with minimum quality loss
Testing is crucial.
Use tools like GTmetrix or Google PageSpeed Insights to measure your progress. A one-second delay in page load time can impact conversions by 7% — optimization isn’t optional.
Social Media Integration Strategy
Your blog post visuals need to work harder than ever in today’s multi-platform era.
Cross-platform optimization takes strategic thinking. According to Google’s blogger development suggestions, successful producers repurpose their material strategically across numerous platforms while keeping brand consistency.
Platform-Specific Strategies
Pinterest optimization (the often-overlooked traffic goldmine) →
- Create vertical pins (1000×1500 pixels) for every blog article
- Use text overlays that summarize your post’s value
- Include your blog URL straight on the image
- Create several pin variations for A/B testing
Facebook and LinkedIn sharing →
- Horizontal photos (1200×630 pixels) perform best
- Include enticing headlines as text overlays
- Use high-contrast colors that stand out in busy feeds
- Add your brand logo tastefully in the corner
Twitter optimization →
- Create Twitter Card images (1024×512 pixels)
- Use strong, easy-to-read fonts
- Include important hashtags as design elements
- Keep text minimal but impactful
The Power of Repurposing
Smart bloggers establish content systems. From one blog post, you can generate →
- Featured image for your blog
- Pinterest pin variants
- Instagram square postings
- Twitter header graphics
- LinkedIn article images
- Facebook cover pics
Automation tools like Buffer, Hootsuite, or Later can automatically resize and optimize your graphics for each platform. This saves hours of laborious work while preserving quality.
Social Sharing Optimization
Make sharing irresistible →
- Include social sharing buttons prominently
- Create quote graphics from your best thoughts
- Design “click to tweet” visuals using your most quotable phrases
- Use consistent branding across all shareable elements
Track what works.
Google Analytics and platform-specific analytics highlight which graphics get the greatest engagement. Double down on popular formats and eliminate what doesn’t work.
Best app post website blog to Twitter(X)
- Buffer
- Schedule tweets with blog links + images
- Clean UI, analytics, multi-account support
- Great for planning multiple blog post tweets
- Hypefury
- Automate tweet threads with blog summaries
- Auto plug your blog after viral tweets
- Made for growth + content creators
- Zapier
- Auto-post blog via RSS to Twitter
- No manual work once set
- Needs setup but 100% hands-free after that
- Typefully
- Write engaging tweet threads from your blog post
- Preview, schedule, and track performance
- Ideal for turning long blogs into viral Twitter threads
- dlvr.it
- Auto-share new blog posts to Twitter, LinkedIn, Facebook
- Basic but reliable RSS-to-social tool
- Perfect for syndicating blog updates

How to Advertise Blog post on Social Media
To advertise your blog post on social media effectively, follow these smart strategies:
- Create platform-specific content: Don’t just drop a link—tailor your message. Use Twitter for punchy hooks, Instagram for carousel summaries or infographics, LinkedIn for value-driven breakdowns, and Facebook for personal stories or group shares.
- Use scroll-stopping visuals: Design clean, bold thumbnails or graphics using Canva or Adobe Express. Posts with images or videos get far higher engagement.
- Write magnetic captions: Start with a hook or problem, offer a solution, and include a clear call to action like “Read full post” or “Link in bio.”
- Turn blog content into micro-content: Convert your blog into bite-sized tips, quotes, polls, or short-form videos to build curiosity and drive clicks.
- Leverage relevant hashtags and keywords: Use niche hashtags to reach your target audience and make your posts discoverable.
- Schedule and repost: Use tools like Buffer, Hypefury, or Metricool to schedule your blog promotions multiple times over weeks. Repetition builds visibility.
- Engage with your audience: Reply to comments, start discussions around your blog topic, and tag relevant people or brands mentioned in your post.
- Use stories and reels: Summarize key blog points in story format or a quick reel. It’s a high-reach format that builds curiosity.
- Collaborate for reach: Tag collaborators, co-creators, or influencers and ask them to reshare. This multiplies reach organically.
- Boost with paid ads: Use a small budget to promote top-performing posts. Platforms like Facebook and Instagram Ads can drive solid traffic when targeted properly.
Design Tools and Resources
Let’s speak about the tools that can turn your blog post visuals from beginner to professional.
Canva remains the gold standard for beginner-friendly design, but your tool choice depends on your skill level and individual needs. Here’s the whole breakdown →
Free Tools That Actually Work
Canva Free Version →
- Thousands of templates for every blog post type
- Basic photo editing capabilities
- Limited stock photographs and elements
- Perfect for beginners and continuous branding
GIMP (GNU Image Manipulation Program) →
- Full-featured photo editing (think Photoshop equivalent)
- Steep learning curve yet highly powerful
- Completely free and open-source
- Great for advanced image processing
Unsplash and Pexels →
- High-quality stock photographs
- Free for commercial use
- Searchable by phrase and color
- Perfect for backdrop images
Premium Tools Worth the Investment
Canva Pro ($12.99/month) →
- Access to premium templates and stock photographs
- Brand kit for consistent colors and fonts
- Background removing tool
- Team collaboration features
Adobe Creative Cloud ($20.99/month) →
- Photoshop for advanced editing
- Illustrator for vector graphics
- InDesign for layout-heavy designs
- Industry-standard tools used by professionals
Figma (Free for personal use) →
- Collaborative design platform
- Excellent for creating design systems
- Web-based with offline capabilities
- Great for team projects
Specialized Tools for Specific Needs
- For social media graphics → Buffer’s Pablo, Stencil, or Crello
- For infographics → Piktochart, Venngage, or Canva’s infographic templates
- For animations → Lottie, After Effects, or Canva’s animation features
- For screenshots → Snagit, CloudApp, or built-in system utilities
Resource Libraries
- Icon libraries → Flaticon, Noun Project, or Feather Icons
- Font combinations → Google Fonts, Adobe Fonts, or Typography.guru
- Color palettes → Coolors.co, Adobe Color, or Paletton
- Design inspiration → Dribbble, Behance, or Pinterest design boards
Pro tip → Create a swipe file with best blog post graphics you admire. Analyze what makes them effective and adapt those principles to your own brand.
Common Mistakes to Avoid
Even expert bloggers make these fundamental blunders that destroy interest and harm SEO.Let’s confront the elephant in the room → most blog post visuals are bad.
They’re either uninteresting stock pictures slapped with text, or overly elaborate designs that detract from the content. Here are the mistakes that differentiate beginners from pros →
Technical Mistakes
Uploading huge image files →
- Mistake → Uploading 5MB photographs directly from your camera
- Solution → Compress to under 150KB using tools like TinyPNG or ShortPixel
- Impact → Slow loading pages impact SEO and user experience
Wrong proportions for your theme →
- Mistake → Using square graphics in a theme built for rectangles
- Solution → Check your theme’s documentation or test alternative sizes
- Impact → Awkward cropping and unpolished appearance
Ignoring mobile optimization →
- Mistake → Designing primarily for desktop viewing
- Solution → Test on mobile devices and adapt accordingly
- Impact → Over 60% of blog traffic is mobile – disregard this at your risk
Design Mistakes
Inconsistent branding →
- Mistake → Using various fonts, colors, and styles across posts
- Solution → Create a brand style guide and stick to it
- Impact → Confused readers who don’t recognize your material
Poor contrast and readability →
- Mistake → Light text on light backgrounds or cluttered, distracting backgrounds
- Solution → Use high contrast and test readability on different devices
- Impact → Readers bounce immediately if they can’t read your visuals
Overcomplicated designs →
- Mistake → Trying to add too many elements or information
- Solution → Follow the “less is more” principle — focus on one main message
- Impact → Confused readers who don’t know where to look
Strategic Mistakes
Not optimizing for search →
- Mistake → Using generic filenames like “image1.jpg”
- Solution → Use descriptive filenames with keywords → “wordpress-blog-post-graphics-guide.jpg”
- Impact → Missed possibilities for image search traffic
Forgetting alt text →
- Mistake → Leaving alt text unfilled or using generic descriptions
- Solution → Write detailed alt text that incorporates your target keywords
- Impact → Poor accessibility and wasted SEO opportunities
Not testing different styles →
- Mistake → Using the same template format for every post
- Solution → A/B test alternative visual designs and track performance
- Impact → Stagnant engagement and missing growth possibilities
The Biggest Mistake of All
Creating visuals as an afterthought.
Your blog post graphics should be prepared during the content writing process, not slapped on at the end. They should reinforce your message, not just beautify it.Successful bloggers design their visual strategy first
, then create content that supports it. This strategy ensures unified, impactful pieces that readers truly want to share.
Advanced Techniques for Maximum Impact
Ready to take your blog post visuals to the next level?
These advanced methods differentiate the pros from the amateurs.
Data-driven design decisions are the hidden weapon of successful bloggers. Google’s creator guidelines highlight that high-performing content creators regularly test and optimize based on actual performance data, not assumptions.
A/B Testing Your Graphics
Test these elements systematically →
- Color schemes (warm vs. cool tones)
- Typography options (serif vs. sans-serif)
- Layout orientations (horizontal vs. vertical Stuhrkampf vertical)
- Image styles (photos vs. illustrations)
- Call-to-action placement and wording
Use tools like Google Optimize or basic split testing to measure which graphics produce more clicks, shares, and engagement. Even a 10% improvement in click-through rate can greatly effect your blog’s growth.
Psychology-Based Design
Color psychology in practice →
- Red → Creates urgency, great for limited-time bargains or critical announcements
- Blue → Builds trust, great for educational or professional content
- Green → Suggests progress and money, perfect for success tales and lessons
- Yellow → Grabs attention, useful for warnings or highlighting critical points
The F-pattern principle → Readers skim text in an F-shaped pattern. Place your most significant visual elements near the top and left side of your visuals to optimize effect.
Emotional triggers → Use facial expressions, directional signals, and color combinations that create the emotions you want readers to feel.
Advanced SEO Optimization
Structured data markup for photos helps search engines understand your material better. Implement schema markup for your blog posts and visuals to boost your chances of appearing in rich snippets.
Image sitemap creation helps Google emblem discover and index your photos faster. Tools like Yoast SEO may automatically generate image sitemaps for WordPress blogs.
Local SEO integration → If you’re targeting local audiences, incorporate location-specific aspects in your visuals and optimize picture filenames with local keywords.
Conversion Optimization
Strategic call-to-action placement →
- Include subtle CTAs in your graphics
- Use directional indicators (arrows, pointing figures) to guide attention
- Test alternative CTA colors and positions
Trust signals → Include accolades, credentials, or social proof aspects in your graphics to enhance trust.
Scarcity and urgency components → Use design elements that generate a sense of limited availability or time sensitivity where applicable.
Automation and Scaling
Template systems → Create master templates that can be readily adjusted for different post kinds. This assures consistency while saving time.
Batch processing → Use tools like Photoshop Actions or Canva’s bulk editing functionality to process many graphics simultaneously.
AI-powered optimization → Tools like Tailor Brands or Looka can develop brand-consistent graphics based on your existing brand guidelines.
Conclusion → Your Blueprint for Magnetic Blog Posts
Creating magnetic blog articles isn’t about luck or talent – it’s about understanding the strategic convergence of design, psychology, and technology. Every part of your blog post visuals should serve a specific purpose → creating trust, generating engagement, supporting your SEO goals, and ultimately converting readers into committed followers.
The key ideas that actually work →
- Optimize image dimensions for your unique platform and theme
- Maintain consistent branding across all visual elements
- Prioritize page speed through intelligent compression
- Create graphics that serve your content, not distract from it
- Test, assess, and optimize based on real performance data
Your next steps →
- Audit your current blog post visuals following the guidelines described in this article
- Choose your design tools and establish a simplified workflow
- Develop brand standards that assure consistency
- Implement the technical optimizations for better performance
- Create a testing schedule to continuously improve your performance
Remember what Google’s creator guidelines emphasize → successful bloggers focus on serving their audience first. Your graphics should make it easier for people to absorb, understand, and share your material – not just look lovely.The bloggers who win in 2025 and beyond are those who recognize that magnetic blog postings are systems, not accidents. They mix strategic design thinking with technological optimization and data-driven decision making.
Ready to alter your blog post graphics?
Start with one post. Apply these concepts, test the results, and scale what works. Your audience is yearning for material that doesn’t just inform, but motivates action. What’s the first graphic element you’ll optimize on your blog? Share your main takeaway in the comments below, and let’s establish a community of artists who realize that great design isn’t just about aesthetics – it’s about results.
Frequently Asked Questions (FAQ’s)
1. How long are blog post
Depending on the topic and aim, blog entries might be anything from 300 to 3,000 words long. For SEO and to be useful to readers, try to write between 1,000 and 2,500 words. That’s the perfect place for depth and engagement to meet.
2. How does blog post look like
A blog post is like a small article on a website. It has a catchy title, an introduction, a number of subheadings, pictures or graphics, and a clear finish or call to action. It’s like a novel or a guide that you can easily scroll through, study, and learn from.
3. How to blog post in WordPress
It’s easy. Log in to your WordPress dashboard, go to “Posts” > “Add New”, compose your material, add a title, photos, and set categories or tags.
4. What is blog post format?
The basic blog format includes:
Title (headline)
Introduction (hook your reader)
Body (with H2/H3 subheadings)
Images, bullet points, or quotes
Conclusion (wrap-up or CTA)
Clean structure + visual flow equals improved readability.
5. What is an example of a blog post?
An example could be: “10 Smart Ways to Save Money as a Student.” It’s instructive, has recommendations or steps, maybe personal experience, and is expressed in a relaxed, friendly tone.
6. How to write a blog post?
Start with a topic that solves a problem or answers a question. Outline your major points, write clearly, and arrange it nicely. Use visuals, add genuine instances, and finish with something actionable. Then proofread and publish.
7. Do blog posts pay?
Yes, they can! You earn from adverts, affiliate links, sponsored content, or even selling your own services/products. But it’s not instant—it takes consistency, traffic, and planning.
8. How to start a blog?
Choose a niche, pick a platform (like WordPress), obtain a domain and hosting, design your site, and start writing. Keep your material helpful and consistent—then focus on promoting and monetizing.
9. How much money per 1000 views on a blog?
It varies. With advertisements (like Google AdSense), you may earn $1 to $10 every 1,000 views, depending on niche and viewership. But with affiliate marketing or digital products, the income potential might be substantially bigger.
Want to go deeper into content production strategies? Check out Daily Growth Blog – ZYPA to explore our resources on establishing an engaged audience around your content.

The work balances clarity and mystery. It offers guidance while preserving space for the reader’s own imagination and insight.
Thank you for your insightful comment! We’re thrilled that our approach resonates with you. Striking the right balance between clarity and mystery is indeed crucial—it guides the reader while leaving room for their imagination. At ZYPA, we believe in empowering creators to craft content that not only informs but also inspires. Your feedback encourages us to continue blending guidance with creative freedom. Keep creating, and keep inspiring! ✨